The following article failed to make it onto the blog in October. Hope it is helpful.
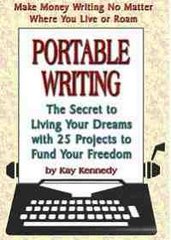
Writing and Publishing Your Own Small Book
For small numbers of books, and for those containing less than 100 pages, it’s much easier to design, layout and print them yourself. Here are the directions for laying out pages for a small cookbook or any other type of little book you want to produce on your own without using a publisher or traditional book printing company. This type of book doesn’t have to look homemade; instead, it can look as professional as any, but it can be easier and faster to do it this way than having to deal with out of town printers and traditional publishers.
However, if you are interested in a do-it-yourself project and want to turn it over to a professional, there are cookbook printers who can do a wonderful job. Morris Cookbooks comes immediately to mind, since they print many of the cookbooks that are sold by non-profit organizations. They’ll provide you with directions for laying out the book according to their format, and can provide cover design, etc. Contact them at www.Morriscookbooks.com. But for others who don’t want to go that route, the following can help you produce a perfectly acceptable book that you can give to friends or sell through your local book outlets and gift shops or by mail or the Internet.
Since some of you probably use Windows and others, Vista, it would be impossible for me to provide directions for both, but if you use Microsoft Word, you should find the following settings on the toolbar at the top of your computer page. The example I use is for a cookbook, but could apply to any type of small book.
To lay out your book’s pages, select “page setup” and choose paper size 11 inch x 8.5 inch in landscape mode.
Choose size of borders: 1.0-inch for left margin and all others, .75-inch.
Choose two columns, select 4-inches wide for each column and 1.5-inch for spacing between columns. This layout creates two pages out of one and leaves enough space on the left side and in the center for binding after being cut in half. Both pages will be identical.
To get started, it is best to have your recipes already typed up and sorted. For a plastic comb or wire bound, follow these directions since pages will be cut in half to form two books. Type or copy a recipe on one page, then copy and paste it onto the other page. To test to make sure spacing is correct and that left margin on both pages is slightly larger, print one copy and fold it in half. If it looks fine, continue typing or copying in your recipes, 1 or 2 per page depending on how you want to set it up.
After all the recipes are typed in, print the pages and then decide which order they should be in, using a paperclip or other fastener to hold them together. Now you can go back to your computer and number the pages. You can also create a table of contents page, index, and any other type of information you want to include. Organize your pages in logical format, such as main dishes, salads, breads, desserts, etc. Decide if you want a dividing page between each category, and plan for that.
If you will be creating a small booklet that will be stapled together at the spine, each full 8-1/2 inch by 11 inch page should hold two separate typed pages since you will be having it printed so that they can be stapled in the middle inside a cover. Again, don’t bother to number your pages until you’ve printed out a copy of the complete contents and have placed them in order. You may have to do some cut and paste on your copies, then shift pages around in your computer program to get the book layout correct.
If the above is confusing, contact me and I’ll try to explain it more clearly. When you get into the project, the directions will make more sense. Also, it helps to have on hand published books similar to what you envision yours looking like so you can visualize the layout and how pages tie together as they’re put together in a book.
Next, design or find clip art suitable for the cover, or use a photograph, and title your book, then copy and paste the cover side-by-side on one landscape mode page just as you did the recipe pages for a ring bound book. For the stapled book, the front and back cover will appear on the same 8-1/2 x 11 page.
Once your pages are in order, have been proofread and retyped, if necessary, and the cover designed, print the complete book out on your desktop printer in “best” printing mode and take them the copies a quick copy center to have them printed and bound. Place your copies back to back like you want them printed and make sure numbers are in sequence for the ring bound book. Remember that each printed page makes two books, so if you have 25 originals, it will create 50 books.
The printer will have a selection of bindings, but the wire and plastic comb spines work best for cookbooks, which need to lay flat on the counter for anyone to cook from them. Other types of books might be stapled at the spine. You can choose the type of cover stock you desire from plain card stock, coated stock, or have the covers laminated.
Then distribute your book. If you want to sell them, contact local restaurants, gift shops, beauty shops, and anywhere a willing owner will sell them for you. It will be best if you’ve made these contacts before you ordered printed copies so you’ll know how many copies you need. You will want to order extra for individual sales by you, and sales made over the Internet or by mail.
If you can partner with a local restaurant before you get started, you may be able to feature some of their most popular recipes in a cookbook, as well as your own. If you come from a geographical area that is famous for its fruit or vegetable crop or a particular type of livestock, etc., you might be able to come up with favorite local recipes to feature in your cookbook.
As an alternative to a cookbook if you live in a popular tourist destination, you can produce a book on local historic sites, history, attractions, scenic drives, local hiking trails, or any number of features that would likely appeal to tourists and sell them through shops, restaurants, bookstores, etc. Don’t forget to approach places like the Automobile Club and local organizations or Chamber of Commerce for possible mass sales of your book.
Good luck with your project. Whether you're doing it simply for the pleasure of sharing favorite recipes with friends and family, or planning to make yours a bestseller, you should enjoy getting your words into print, from start to finish.
No comments:
Post a Comment